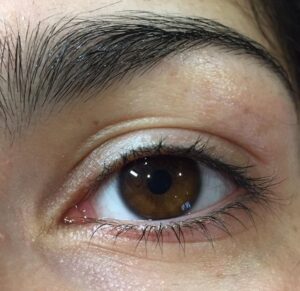
Lash mapping and sequence
Mapping out the lashes:
Mapping out lashes involves dividing the lash line into a variation of different sections depending on the style, each area will indicate the lash length to apply in that area. Lash extension length will be determined by the length of the client’s natural lashes.
Please see table below: (This design is for a natural lash)
A natural look will hold approximately 30 – 60 eyelash extensions per eye
A glamour look will hold approximately 60 – 70+ eyelash extensions per eye
Please note these are guidelines, you may need to add more or less lashes to keep the look symmetrical.
Other lash extension styles include:

Weight options with classic lashes:
0.15
0.12
0.10
0.05
0.07
Different Lash lengths:
Can range from 6mm to 14mm
Selecting the correct Lashes:
Choosing a healthy donor lash will ensure longer lasting extensions. Mature lashes will tend to fall out first and will not have a very long life span when used for attaching lash extensions. Premature lashes will not have enough strength to hold up the lash extension.
Lash weight:
Match the thickness of the client’s natural lashes to the lash extensions to ensure a balanced and safe application to the donor lash. Mainly 0.15 are used in classic lashes
Lash Length:
Check the client’s length of their natural lashes, you may need to customise the length of the lash extensions depending on your clients natural lashes so the examples may be slightly different.
Shorter lash lengths will be suitable for people who wear glasses.
Setting the lash sequence:
This means the order the lashes are placed and applied to the lash line.
- Firstly use the lash mapping techniques to determine what length you’re going to set the lashes at
- Begin the treatment by starting at the outer corner of the lash line on the first eye by placing one extensions in each zone then repeat on the second eye.
- Repeat this until you’ve got around 60 lashes per eye. This would be more of a natural look, if the client wants more of a dramatic look then keep adding 12 passes at a time until you reach the desired look.
- If the client has more rounded eyes then apply longer lashes towards the outer corner of the eye
Step by Step guide how to apply classic lashes:
- Cleanse the eye area with oil free pads
- Use tape or under eye treatment pads to hold down the bottom lashes
- Ask the client to keep their eyes closed for the remainder of the treatment
- Comb through the natural lashes into their correct position to ensure no lashes are trapped or crossed
- Select the appropriate thickness, size and curl of the lash extension
- Dispense a small amount of adhesive into the cup, tile or jade stone ensuring you burp the bottle before securing the cap back on the bottle
- Familiarise yourself with the clients lashes
- Comb the lashes and apply a protein remover
- Comb the lashes again
- Visualise and map where you’re going to go with the first set of individual lashes on the upper lash line, it is also useful to write your lash lengths on the gel pads or micropore tape to mark the length change points
- Hold the curved tweezers in the left hand to sperate or isolate the lashes and hold the straight tweezers in the right hand to pick up and apply lashes
- Sweep the chosen lash extension into the adhesive, not too much just a small amount so you get a small bulb at the base of the lash extension
- Isolation is now required using the isolation tweezers, start at the base of the lash, gently open the tweezers and you will be left with one isolated natural lash
- Using your placement tweezers gently swipe the lash extension from the base to the tip of the natural lash three times. The extension should grab on to the natural lash to aim for a neat bond ( adhesive should never touch the lash root )
- Ensure the lash is pointing upwards and it is in the correct direction before the adhesive sets. You may need to wipe adhesive from your tweezers in between application
- Release the isolation tweezers, prepare to apply the second lash using the same method
- Complete the pass of one lash extensions in each section then move on to the second eye and so on refereeing to guidelines with lash sequence technique and your mapping for the clients chosen look
- Once completed comb through the lashes and ask the client to open their eyes afterwards to check if there is any gaps in case you need to go back and add a few more extensions in
- Once happy remove the under eye pads or tape and wipe away any excess residue that may have been left behind
- Give aftercare advice
- Rebook the client for their maintenance appointment
Infills and Maintenance:
We recommend that your client books an appointment back in for the first maintenance / infill approximately 2 to 3 weeks after the application. The purpose of a maintenance appointment are to repair, top-up or to add extra lash extensions as required. Clients can lose up to five of their natural lashes everyday so this is essential maintenance to keep the lashes looking their best.
Keep a record on the client’s card where you originally placed lashes. If you cannot find enough healthy lashes to adhere extensions to then finish off the application by attaching to mature lashes. These will be the first lashes that fall out therefore they will be the first lashes to be replaced at maintenance.
The immature lashes will now have grown into healthy lashes for you to attach the new extensions to. This cycle will repeat month after month giving you a constant supply of healthy lashes to adhere to.
Removal of the lashes:
“The client’s eyes must always be kept closed”
Reasons you might be removing eyelash extensions:
- If your client decides to have an eyelash break and has the last few remaining
- For medical reasons or if they’re going to be having an operation and can’t leave them on
- If they’ve had a reaction towards their extensions and they need to be removed for safety
- Removal:
- Place eye tape or under eye pads on top of the lower lash line
- Use one dry cotton bud underneath the extensions, whilst you use another cotton bud over the top of the extensions, with a small amount of the remover on it.
- Do not saturate the cotton bud, use tiny amounts rather than risk having too much product around the eye area
- Run the product in an upwards motion along the eyelash extensions, run the cotton bud from root to tip until they gently lift off
- Once the removal is complete, clean the eye area with oil free cleanser
- Wait before applying more lash extensions as the remover is quite oily so it’s advisable to thoroughly cleanse with an oil free cleanser then blow the lashes dry using blower, it can sometimes be quite difficult to bond the new lashes together due to poor preparation following removal